The mythical Teardrop spotted at Raystown Lake
It was ultimately successful. The week prior to the trip, I began working on the taillight and side marker lighting. I had parts arriving from etrailer.com and still a general sense of calm at this point.
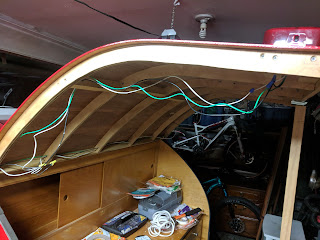
Wiring tail lights mounted in the hatch door
Both tail lights wired up, but not tidy yet
The wiring for this teardrop build vs. a typical utility trailer is unique for the taillights. The three wires must run through the galley door and some portion of them continues on through the conduit in the left side of the galley sliding cabinet. I'll produce a wiring diagram in time.
I'd also discovered that the wire colors on these taillights (driver's side, passenger side) I used was backwards. The white ground wire was fine, but the green and black were flipped. Thanks much to etrailer.com customer service answering my question about that so quickly!
That's important, since I zapped more money towards them that week for another set of side marker lights. And then did that again for yet another set, but this time with red lenses for the rear lights. You need orange up front, red on the rear markers.
With the wiring mostly in place, what else could there be? Oh, so much more! Only when faced with a deadline do all the little details ferret their way out! Here's a list I produced with only one week to spare:
Teardrop to do 8/27/18
- Bend door trim into place
- Check for weather gaps
- Install wheels? TBD
- Final bolt check
- Tongue height check
- Fix blinkers
- Install rear markers and finish front ones
- Tie up and tape wiring
- Weatherstrip tongue box
- Tongue box latch
- fabricate bumper
- weatherstrip bottom of hatch
- install hatch side brackets
All of this, and whatever other prep was jammed in between, continued up until 1:30 AM Saturday of departure. Plenty of time to spare!
The bumper in place, no trim yet
Hatch lower latch in place
A big chunk of time was finishing the wiring, with plenty of splicing, cutting and twisting. Another black hole of time was the bumper. For something that's just made out of a hunk of 2x4, my application required a lot of trimming and cutting such that it fit the weird angle of my metal frame at the back.
I had to nail down some weatherstrip issues and gaps here-and-there, and thankfully none of it was tested through the weekend. What looked like three days of scattered thunderstorms turned into three days of blazing heat and sun - and all because I took the time to work out the weatherstrip. You can thank me later!
We jammed the rest of the packing together early Saturday morning and we were off to the lake for what turned out to be a great weekend. I'll drop a few more photos below, but have a full set in my other blog. There are still plenty of things to tweak and add to the teardrop, so this is hardly the end. Like a lot of things, the teardrop is never "finished", I just had to hit a deadline for road-readiness.
-cheers


