Showing posts with label wiring. Show all posts

Wednesday, September 5, 2018

Huge Teardrop Wrap-up

The two weeks since the last post became a blur of activity. We decided to take the teardrop camping for the Labor Day weekend. We'd wrap up all remaining road-worthiness details and let the rubber hit the road. Typical work proceeded in the two weeks between, up until the final days and hours before embarking on the trip on Saturday the 1st for Raystown Lake in Pennsylvania.


The mythical Teardrop spotted at Raystown Lake

It was ultimately successful. The week prior to the trip, I began working on the taillight and side marker lighting. I had parts arriving from etrailer.com and still a general sense of calm at this point.


 Wiring tail lights mounted in the hatch door


Both tail lights wired up, but not tidy yet


The wiring for this teardrop build vs. a typical utility trailer is unique for the taillights. The three wires must run through the galley door and some portion of them continues on through the conduit in the left side of the galley sliding cabinet. I'll produce a wiring diagram in time.

I'd also discovered that the wire colors on these taillights (driver's side, passenger side) I used was backwards. The white ground wire was fine, but the green and black were flipped. Thanks much to etrailer.com customer service answering my question about that so quickly!

That's important, since I zapped more money towards them that week for another set of side marker lights. And then did that again for yet another set, but this time with red lenses for the rear lights. You need orange up front, red on the rear markers.

With the wiring mostly in place, what else could there be? Oh, so much more! Only when faced with a deadline do all the little details ferret their way out! Here's a list I produced with only one week to spare:


Teardrop to do 8/27/18


  • Bend door trim into place 
  • Check for weather gaps 
  • Install wheels? TBD
  • Final bolt check 
  • Tongue height check 
  • Fix blinkers 
  • Install rear markers and finish front ones 
  • Tie up and tape wiring 
  • Weatherstrip tongue box 
  • Tongue box latch 
  • fabricate bumper 
  • weatherstrip bottom of hatch 
  • install hatch side brackets


All of this, and whatever other prep was jammed in between, continued up until 1:30 AM Saturday of departure. Plenty of time to spare!


 The bumper in place, no trim yet


Hatch lower latch in place

A big chunk of time was finishing the wiring, with plenty of splicing, cutting and twisting. Another black hole of time was the bumper. For something that's just made out of a hunk of 2x4, my application required a lot of trimming and cutting such that it fit the weird angle of my metal frame at the back.

I had to nail down some weatherstrip issues and gaps here-and-there, and thankfully none of it was tested through the weekend. What looked like three days of scattered thunderstorms turned into three days of blazing heat and sun - and all because I took the time to work out the weatherstrip. You can thank me later!

We jammed the rest of the packing together early Saturday morning and we were off to the lake for what turned out to be a great weekend. I'll drop a few more photos below, but have a full set in my other blog. There are still plenty of things to tweak and add to the teardrop, so this is hardly the end. Like a lot of things, the teardrop is never "finished", I just had to hit a deadline for road-readiness.

-cheers

Friday, August 17, 2018

Finishing the Side Doors

It's really come together the last two weeks. Both side doors are fully installed and complete with door locks, handles, weatherstrip and windows.


Left door handle in lock installed 


Right side door completely installed 


Left door complete with window open


The doors didn't fit exactly the same in their frames. I had to use different weatherstrip on some areas of each. The right side door was particularly finicky, as I'd said in my previous post. I had to remove the screws from the curved weatherstrip section, drill the holes out a bit more and sink new screws a bit deeper so that the heads were more flush. Just that little bit did it.


Inside molding weatherstrip is 3/16" thick 


Left door jam weatherstrip is also 3/16" thick 


Right door jam required 3/16" automotive style weatherstrip


I've also done some more shopping. I picked up a pair of LED side marker lights from etrailer.com. A trip to Home Depot set me up with spools of 14ga wire in black, white and green for wiring of the tail and marker lights. I'm also feeling like I'll pull the trigger on these wheel/tire combos as well. Here's a photo below.


I've entered that period of time where I'm asking myself what else do I really need to do to get this thing roadworthy? The tasks are dwindling! I'm beginning to think I should plan a fall trip and get a deadline down.

Monday, July 16, 2018

Teardrop Trim, Wiring and More

I was on vacation last week, so there's been plenty of teardrop activities to discuss. This was a staycation with the direct purpose of accelerating the teardrop build. The tongue box is almost finally complete, it became a project just on its own.


It's now fully installed, with four mounting points on the metal frame rails. I had spent a bit of time looking for pre-fabricated boxes on the internet and couldn't find anything that met my specifications. I wanted a perfect spot to place the deep cycle battery, jacks, wheel chocks among other things.


This above is the interior of the tongue box, and a shot of the battery box in its mounted location. I've mounted it a bit off-center to allow for a small propane tank.


Above, the battery is in place with the battery box lid in place. I have a 20 amp main breaker in place above that for full system shutdown. I moved onto the cabin wiring again while I had the electrical tools in my tool belt. I wired in the 12-volt receptacle to the electrical raceway door, shown below, running wiring to the fuse box, ground bar and main bus bar.


In all its chrome glory, you see it below. It also works, which is always pretty fantastic.


To the left of the outlet in the photo above lives another receptacle slot that's designated for a household 110v receptacle tied to an inverter. I'm pushing that down the road a bit, I can only order so many parts at a time.

That brings me to the fenders that just came in from etrailer.com. Keeping with the accent motif, I'd ordered a pair of aluminum fenders in diamond plate.


Above is one fender on the workbench along with two side doors with a fresh coat of polyurethane on the inside surface. I sanded and cleaned up those surfaces earlier this week. The inside surfaces received two coats of poly, ultimately.

I had the fenders shipped in with the goal of installing them last week. Mission accomplished, as you can see below.


I had to pop the wheels off to install the fenders. I drilled five holes in the sides and mounted them directly to the walls of the teardrop with 3/4" screws. Note that I will be replacing the white wheels with alloy wheels and radial tires, which should fit the overall look better.

The next area to be tackled was the hatch weatherstrip, which is a trial and error endeavor. I settled on a solution for the hatch-to-side-wall interface that utilizes two different thicknesses of weatherstrip.


The space between the hatch door and the walls varies anywhere from 1/16" to 7/16", so I pulled some 5/16" and 7/16" foam weatherstrip off the rack from Home Depot. In the photo above, there are thicker sections upper and lower, with the skinny stuff in the middle. It works pretty well, even if it's not super attractive.

Back to the doors and trim. I'm working with 3/4" angle aluminum to fabricate outside trim for the side doors. I'm using a propane torch to heath the material and gradually bend it along the outer curved section of the side doors.


In the above photo, you see one of the old doors serving as a mold for the aluminum bending. I used the old doors so that there wouldn't be any heat damage to the paint while softening the aluminum. I did the bending while the door was vertically oriented in the workbench in order to provide downward pressure more easily. Heat, bend a small section, screw it down and repeat. While doing this, I drilled 1/8" holes in the aluminum butting against the door edges.

I'm currently working on the second door trim. Both will require some final trimming once they are mounted on the new doors. This may require some heat, but just a little. I think. Touch and go.

I'm on to the week after vacation, so time will be shorter. But I'm getting close to finishing, like you finish any project. You just hit a deadline, which is still nebulous, so I'm just steadfastly chipping along. Here's a photo to leave this post with me and the shop cat, Tommy.


-cheers


Sunday, April 15, 2018

Teardrop Wiring: Raceway, Lights and Fan plus some Other Goodies

Spring 2018 started to show itself a bit a week or two ago. I decided to get into some wiring and also made my final decision on building a tongue box rather than buying one. The motivation was that I could customize the size to fit my needs. It'll be large enough to house the deep cycle battery and a full size propane tank. I'm not sure yet if I'll run a full size propane tank regularly, but perhaps for longer trips. 


Above, I'm cutting chunks of 3/4" plywood for the tongue box. The temperature was finally in the 50s again finally. Immediately the next day we had about 4 inches of show. Such is the new Spring here in Pennsylvania.


I've now mounted key elements of the wiring blocks in the raceway. Below, from left to right: busbar, ground-bar and fuse block.


The photo below is just a higher elevation view of the wiring raceway to provide a different angle. I have to break now to establish a milestone. Up to this point, the cabin lights and fan have been sitting quietly in place with the their wiring running through the ceiling and dangling into the raceway. I've finally terminated all that onto the fuse and ground blocks. The wiring from the tongue to the raceway is now also in place and connected.


With drums rolling, I set the battery on the tongue, popped in my fuses and flicked the switch on the main fuse...

We have power!


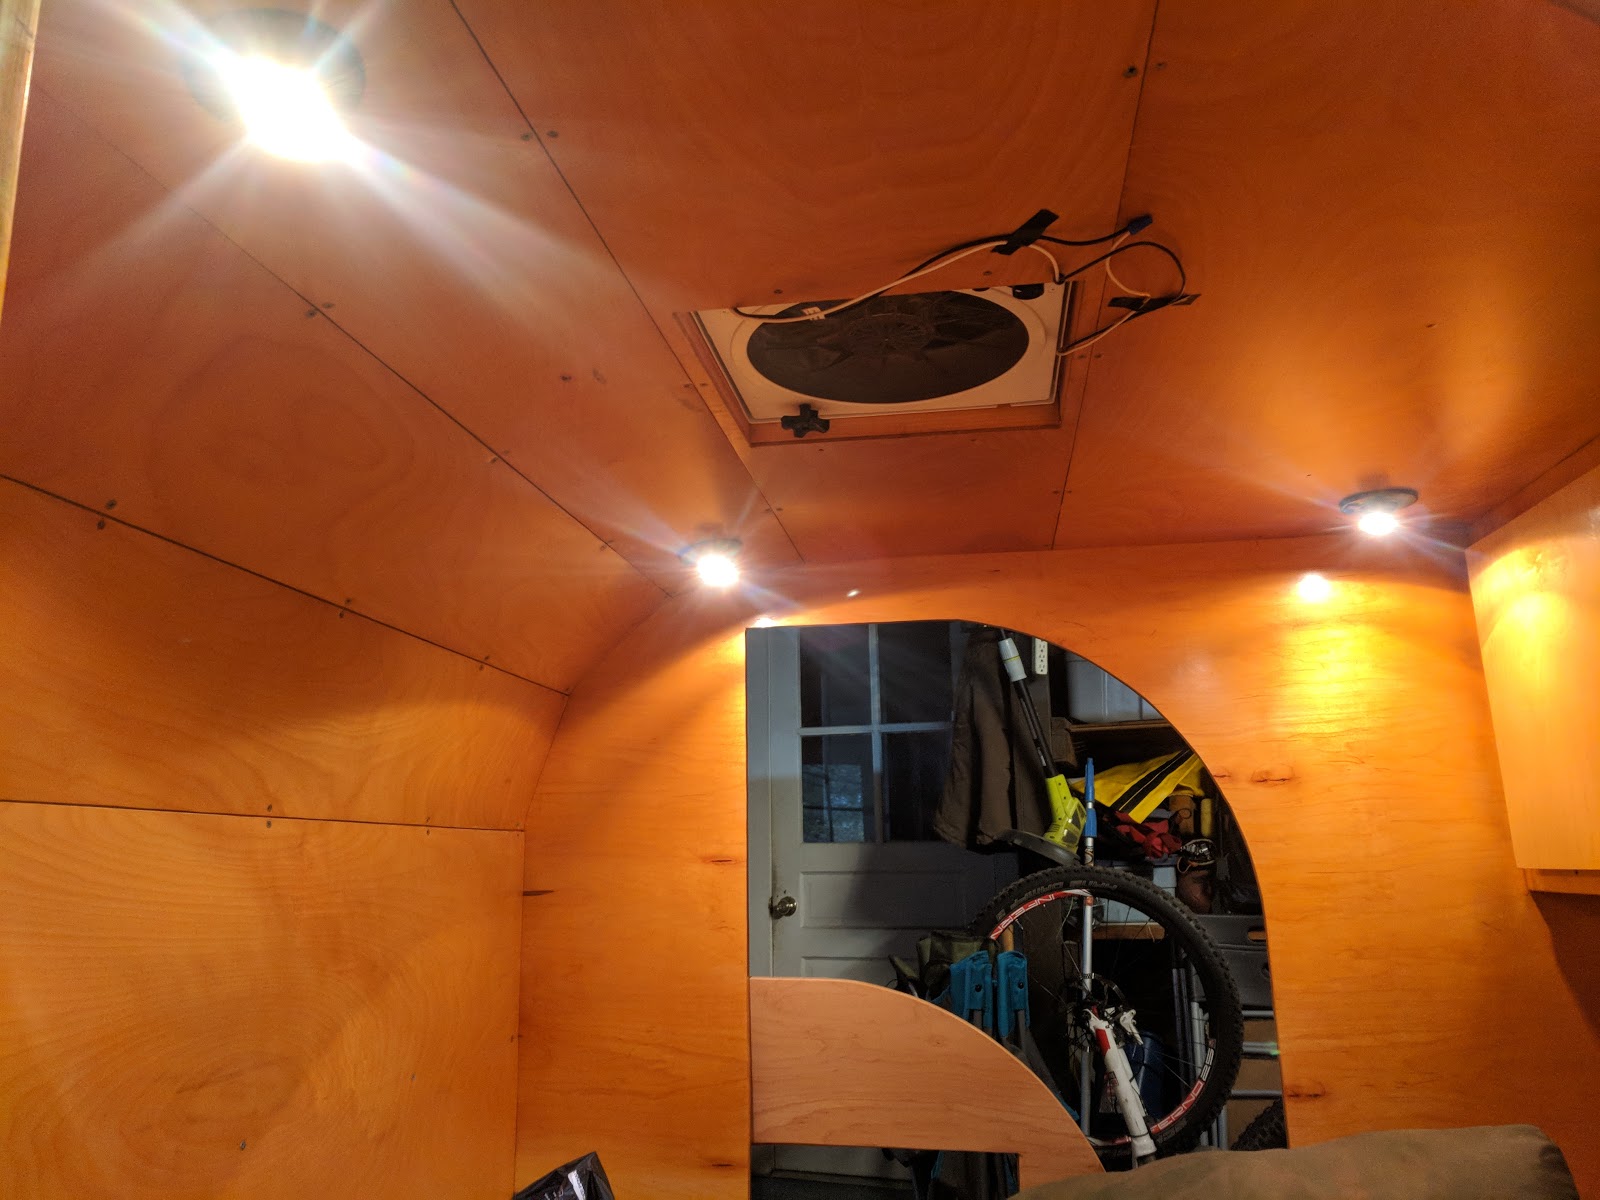
Ok, it's a minor accomplishment, but a good sanity check to ensure I didn't drive a screw through a wire somewhere up there. Below, I have two photos of all four cabin lights in all their glory.


I have the battery resting below with temporary connections, waiting until I have the tongue box built up. In the lower left of the photo you see the 20 amp fuse on the positive terminal side.


Below, I have a more focused view of the electrical raceway. On the left is the main busbar with the positive feed from the battery. The busbar breaks off at the top into the fan and two light feeds into the fuse block on the right. The middle block is the main ground. I'll post explicit wiring diagrams in a later post. I mean really explicit, NSFW (not safe for wiring more likely).


I've also tested the fan wiring, which you can see temporarily wired up in a few of the previous photos Final wiring for the fan will occur after painting and trim work. It was certainly a milestone to see the internal wiring operational.

I'll move on to the tongue box this week with a really nice battery mounting situation in mind, along with storage.

-g

Thursday, May 11, 2017

Fan Club

I received the vent fan yesterday. It's a Fan-Tastic model 1200 12v DC unit. The box was fairly dinged up, but the contents were just fine. My first impression was that this was of much better quality than my previous fan. Here I have it placed on the roof.


The body is molded in plastic, which I feel is an improvement over the white-painted metal of the prior fan. The paint began to chip and peel over time on that unit. Below I have a photo from the interior. The fan included an interior molding piece, which will clean up the look when finally installed.


Back on the workbench, we can take a closer look at the underside. There is a 3-speed control knob, a fuse slot and the dome lift knob. It lifts easily and smoothly.


The first thing I noticed with the fan was that its diameter was nearly the size of the entire unit. It's quite a bit larger than my last fan. The next thing I noticed was how much more air this fan pushes, and how quiet it is while it does that. I took a quick video of the fan's operation, embedded below.


Like I've said in the video, the lowest fan setting provided great airflow, certainly appropriate for the Teardrop cabin. I actually think the two higher settings would make it downright windy inside the cabin.Those may be handy to blow out moisture perhaps or obtain some sort of atmospheric liftoff.

Maybe that's a stretch.

-g

Saturday, September 17, 2016

Building a Teardrop Hatch

This part can be a little hairy. I remember it so from the first build. The galley hatch construction is more art than science, despite how much you measure everything. You get a bunch of weird curves and end-angles on the hatch ribs that you sort of shrug at and say, "I'll fix it later".


That said, there are the hatch ribs cut and ready. Despite using the first rib as a template, they all come out a little bit different due to using a jigsaw to cut those arcs. Jigsaws wander a bit. Below, I clamped them all together and took a belt sander to the arcs to smooth out some of the differences.


I made a Home Depot trip today to pick up some poplar 1" x 2" spars to frame out the hatch. I also grabbed a miter box, which you'll see below, since my miter saw is currently elsewhere. I cut the spars for the top and bottom of the hatch assembly (56 1/2" wide) with the miter box and assembled the outer frame of the hatch.


Don't forget to countersink for the screws on the sides, otherwise you'll get some splitting of the plywood. I'm going to let this set and dry overnight and continue shortly with the rest of the ribs. I've just ordered a set of tail lights that will be placed on the hatch once it's completed here. I mention this because this impacts the placement of the hatch ribs closest to the outside left and right ribs. I'm building for about an eight inch mounting location of the tail light.

There were some other sundry activities as well. I added another coat of polyurethane to the drawer faces and the galley doors. Those are almost done. I have this cryptic map of their progress with fractional values.

I also bored out more holes for wiring. Below, we have the egress hole for the raceway wiring which must somehow get down underneath the teardrop floor and move toward the front. The next photo is a hole in the floor which allows this action to happen. Obviously there will be a sealing opportunity here to keep the road out of the cabin.


I apologize for the second non-focused photo, cell cameras do whatever they want. I'll run some form of conduit through the cabin near the end of this journey.

I'm really excited about the progress very recently. Much more to come soon, I hope.

[g]

Saturday, September 3, 2016

In rare moments of free time, I can get things done. Motivated by the new battery and the positive wiring tests, I ran the fan wiring and buttoned it all down in preparation for the last of the roof install.


That's the complete wiring for the four cabin lights and the fan (to be installed later). I have a shitty, loud fan/vent from previous projects, but I have to go for something better here. Below, you'll see the fan wiring hanging out and then the all the lights and fan wiring running out of the conduit to the wiring raceway.


Maybe, just maybe... I'll get this last piece of the roof installed this weekend. I'll have to dust off my precision circular saw skills once again, it's been a while.

[g]

September Teardrop Update - Wiring

It's been a while! I haven't ignored the blog, I really haven't had much time to work on the Teardrop with all the Summer activities going on, not to mention a busy August at work. I did manage to wire the interior cabin lights and drop the wiring down the conduit to the electrical raceway. Here's a view of the top:


I've had a bit of a hold up anyway, as I wasn't able to test these connections due to lack of a (good) 12v battery. Once tested, I can install the remainder of the roof. I think I even have the suitable plywood. Oh but what do we have here...


Yes, I just picked up a marine battery to power all your teardrop camper needs. I just tested the wiring, and all four lights fire up perfectly. There is one other thing before I close up the roof: I need to run the wiring for the ceiling fan. I should be able to get that done this weekend.

With Fall creeping up, maybe I'll have to time to get crackin' on this.

[g]

Tuesday, October 27, 2015

Teardrop Blog Milestone

According to the stats, the Teardrop blog has just surpassed 6,000 views. That's really pretty small, relative to actual popular sites on the Internet, but it's something. Something to toast to, and I'll take anything to have an excuse for a drink!

I checked my auto photo backup, and have just one meager step to update on. I drilled the hole for the conduit in the headliner above the cabinet area in the galley. Below, you can see the top-down view and then from the side.


I think I've drilled it 1 1/4" in diameter, and I'll grab some conduit to pop in there on my next Home Depot trip. That's an easy task. I need to pick up some 1/4" plywood for the outside skin at the front of the teardrop, now that I've extended the wiring for the front lights backwards.

Under the miscellaneous category, I've fueled up the kerosene heater for the garage and slapped the new battery tender on the deep cycle battery. Now we just wait for some free time to get more work done... a tough order during the holidays, which have already effectively begun in my life.

cheers!
[g]