I began the arduous task of fitting the aluminum door trim a few days ago. The process is a little time-consuming and a bit difficult, but here we have it.
I used lengths of 3/4" angle aluminum, which should be available at Home Depot or Lowes. One side of the piece should rest against the perimeter of the door, while the other continues outward from the outer surface of the door. A photo would help.
As you can see in the photo above, the angle aluminum is situated in a manner that creates a flange on the outer surface of the door, we're looking at the inside surface on the old door serving as a mold.
I used a propane torch to heat and bend the aluminum for the rounded section. I first attached one end of the aluminum to my "mold", which was the old doors, with a single screw through a pre-drilled hole. I then began to gradually heat sections of the material, gently pushing in the direction of the bend. I did this little-by-little. It'll bend when it's heated enough, you don't need to torque it very hard. In reality, that makes it worse.
Wear a thick pair of gloves, and take your time. They came out pretty decent, the second piece is better than the first, which lends credence to the phrase practice makes perf... improved. There are adjustments to make afterwards to get things a bit straighter, or to conform to the door edges better.
When installing either the bendy part or the bottom section, I first applied silicone caulk to the edge of the doors and squished the aluminum on top. I pre-drilled holes in the sections and used 3/4" screws to secure the sections.
That was about it for the evening last night. The silicone needs to dry before I start sliming everything with it. Installation... soon to come!
-g
A blog documenting the building, re-building, travels and experiences of a DIY Teardrop camping trailer.
Showing posts with label woodworking. Show all posts
Wednesday, July 18, 2018
Aluminum Door Trimming
Monday, July 16, 2018
Teardrop Trim, Wiring and More
I was on vacation last week, so there's been plenty of teardrop activities to discuss. This was a staycation with the direct purpose of accelerating the teardrop build. The tongue box is almost finally complete, it became a project just on its own.
It's now fully installed, with four mounting points on the metal frame rails. I had spent a bit of time looking for pre-fabricated boxes on the internet and couldn't find anything that met my specifications. I wanted a perfect spot to place the deep cycle battery, jacks, wheel chocks among other things.
This above is the interior of the tongue box, and a shot of the battery box in its mounted location. I've mounted it a bit off-center to allow for a small propane tank.
Above, the battery is in place with the battery box lid in place. I have a 20 amp main breaker in place above that for full system shutdown. I moved onto the cabin wiring again while I had the electrical tools in my tool belt. I wired in the 12-volt receptacle to the electrical raceway door, shown below, running wiring to the fuse box, ground bar and main bus bar.
In all its chrome glory, you see it below. It also works, which is always pretty fantastic.
To the left of the outlet in the photo above lives another receptacle slot that's designated for a household 110v receptacle tied to an inverter. I'm pushing that down the road a bit, I can only order so many parts at a time.
That brings me to the fenders that just came in from etrailer.com. Keeping with the accent motif, I'd ordered a pair of aluminum fenders in diamond plate.
Above is one fender on the workbench along with two side doors with a fresh coat of polyurethane on the inside surface. I sanded and cleaned up those surfaces earlier this week. The inside surfaces received two coats of poly, ultimately.
I had the fenders shipped in with the goal of installing them last week. Mission accomplished, as you can see below.
I had to pop the wheels off to install the fenders. I drilled five holes in the sides and mounted them directly to the walls of the teardrop with 3/4" screws. Note that I will be replacing the white wheels with alloy wheels and radial tires, which should fit the overall look better.
The next area to be tackled was the hatch weatherstrip, which is a trial and error endeavor. I settled on a solution for the hatch-to-side-wall interface that utilizes two different thicknesses of weatherstrip.
The space between the hatch door and the walls varies anywhere from 1/16" to 7/16", so I pulled some 5/16" and 7/16" foam weatherstrip off the rack from Home Depot. In the photo above, there are thicker sections upper and lower, with the skinny stuff in the middle. It works pretty well, even if it's not super attractive.
Back to the doors and trim. I'm working with 3/4" angle aluminum to fabricate outside trim for the side doors. I'm using a propane torch to heath the material and gradually bend it along the outer curved section of the side doors.
In the above photo, you see one of the old doors serving as a mold for the aluminum bending. I used the old doors so that there wouldn't be any heat damage to the paint while softening the aluminum. I did the bending while the door was vertically oriented in the workbench in order to provide downward pressure more easily. Heat, bend a small section, screw it down and repeat. While doing this, I drilled 1/8" holes in the aluminum butting against the door edges.
I'm currently working on the second door trim. Both will require some final trimming once they are mounted on the new doors. This may require some heat, but just a little. I think. Touch and go.
I'm on to the week after vacation, so time will be shorter. But I'm getting close to finishing, like you finish any project. You just hit a deadline, which is still nebulous, so I'm just steadfastly chipping along. Here's a photo to leave this post with me and the shop cat, Tommy.
-cheers
It's now fully installed, with four mounting points on the metal frame rails. I had spent a bit of time looking for pre-fabricated boxes on the internet and couldn't find anything that met my specifications. I wanted a perfect spot to place the deep cycle battery, jacks, wheel chocks among other things.
This above is the interior of the tongue box, and a shot of the battery box in its mounted location. I've mounted it a bit off-center to allow for a small propane tank.
Above, the battery is in place with the battery box lid in place. I have a 20 amp main breaker in place above that for full system shutdown. I moved onto the cabin wiring again while I had the electrical tools in my tool belt. I wired in the 12-volt receptacle to the electrical raceway door, shown below, running wiring to the fuse box, ground bar and main bus bar.
In all its chrome glory, you see it below. It also works, which is always pretty fantastic.
To the left of the outlet in the photo above lives another receptacle slot that's designated for a household 110v receptacle tied to an inverter. I'm pushing that down the road a bit, I can only order so many parts at a time.
That brings me to the fenders that just came in from etrailer.com. Keeping with the accent motif, I'd ordered a pair of aluminum fenders in diamond plate.
Above is one fender on the workbench along with two side doors with a fresh coat of polyurethane on the inside surface. I sanded and cleaned up those surfaces earlier this week. The inside surfaces received two coats of poly, ultimately.
I had the fenders shipped in with the goal of installing them last week. Mission accomplished, as you can see below.
I had to pop the wheels off to install the fenders. I drilled five holes in the sides and mounted them directly to the walls of the teardrop with 3/4" screws. Note that I will be replacing the white wheels with alloy wheels and radial tires, which should fit the overall look better.
The next area to be tackled was the hatch weatherstrip, which is a trial and error endeavor. I settled on a solution for the hatch-to-side-wall interface that utilizes two different thicknesses of weatherstrip.
The space between the hatch door and the walls varies anywhere from 1/16" to 7/16", so I pulled some 5/16" and 7/16" foam weatherstrip off the rack from Home Depot. In the photo above, there are thicker sections upper and lower, with the skinny stuff in the middle. It works pretty well, even if it's not super attractive.
Back to the doors and trim. I'm working with 3/4" angle aluminum to fabricate outside trim for the side doors. I'm using a propane torch to heath the material and gradually bend it along the outer curved section of the side doors.
In the above photo, you see one of the old doors serving as a mold for the aluminum bending. I used the old doors so that there wouldn't be any heat damage to the paint while softening the aluminum. I did the bending while the door was vertically oriented in the workbench in order to provide downward pressure more easily. Heat, bend a small section, screw it down and repeat. While doing this, I drilled 1/8" holes in the aluminum butting against the door edges.
I'm currently working on the second door trim. Both will require some final trimming once they are mounted on the new doors. This may require some heat, but just a little. I think. Touch and go.
I'm on to the week after vacation, so time will be shorter. But I'm getting close to finishing, like you finish any project. You just hit a deadline, which is still nebulous, so I'm just steadfastly chipping along. Here's a photo to leave this post with me and the shop cat, Tommy.
-cheers
Labels:
aluminum,
battery,
Benroy,
build,
camper,
diamond plate,
doors,
fenders,
fuse,
galley,
hatch,
polyurethane,
RV,
sealer,
teardrop,
tongue box,
trailer,
wiring,
woodworking
Thursday, June 28, 2018
Hurricane Hinge, Fire and Diamond Plate
Sorry for the incendiary title. I'm really nailing some things down these days, as I follow directly from that last blog post a few days ago. The lock set has arrived, I bought all the diamond plate that Home Depot had and another coat of Fire Red poly paint went on the sides.
First, however, I'll get to the topic of the hatch door to body hinge. Known as the Hurricane Hinge, it's a bit of a must have for teardrop construction. It's available on Amazon, from the same company that produces the door handles I'd also purchased. The key to the hinge is that it rolls over into itself, preventing water from flowing down into the hinge apparatus. Above, it's been permanently screwed to the roof, along with silicone sealant below.
Above, we have the custom tongue box with aluminum diamond plate sheeting on the sides. I used .025" thickness, since it's not providing structural rigidity. I applied Gorilla Glue construction glue between the box walls and the sheets and then riveted it on in several places. The lid is soon to come, after moving to other areas.
Onto the galley, where the hatch door now permanently hovers over, as I've said earlier. An interesting thing happened once the door was fully installed. The sliding doors in the galley were jammed. It looks like the 2x2" crossbar just underneath the hinge and above the sliders became less bowed. I had to pop the top face of the galley and trim the edges of the doors slightly. Fortunately, I designed the top face and slider assembly to be removable.
I also adjusted the drawer faces for better fit while I was in the neighborhood. They weren't quite straight with one-another. This was an appropriate time to install the hatch door handle and striker. This was a bit delicate. Install the handle and latch plate first, and then the goal is to determine where you want the hatch door to rest in "closed" position, and get that spot marked for the striker.
Looking at the above photo, I need to install a bumper, trim and weatherstrip around the hatch door. Another major task arriving soon is fitting the side doors and installing their windows, handles, locks and trim/weatherstrip. Still plenty to keep me busy!
-cheers
Hurricane Hinge holding the hatch
First, however, I'll get to the topic of the hatch door to body hinge. Known as the Hurricane Hinge, it's a bit of a must have for teardrop construction. It's available on Amazon, from the same company that produces the door handles I'd also purchased. The key to the hinge is that it rolls over into itself, preventing water from flowing down into the hinge apparatus. Above, it's been permanently screwed to the roof, along with silicone sealant below.
Diamond plate and Fire Red paint are snappy together
Above, we have the custom tongue box with aluminum diamond plate sheeting on the sides. I used .025" thickness, since it's not providing structural rigidity. I applied Gorilla Glue construction glue between the box walls and the sheets and then riveted it on in several places. The lid is soon to come, after moving to other areas.
Onto the galley, where the hatch door now permanently hovers over, as I've said earlier. An interesting thing happened once the door was fully installed. The sliding doors in the galley were jammed. It looks like the 2x2" crossbar just underneath the hinge and above the sliders became less bowed. I had to pop the top face of the galley and trim the edges of the doors slightly. Fortunately, I designed the top face and slider assembly to be removable.
Hatch door locking mechanism
I also adjusted the drawer faces for better fit while I was in the neighborhood. They weren't quite straight with one-another. This was an appropriate time to install the hatch door handle and striker. This was a bit delicate. Install the handle and latch plate first, and then the goal is to determine where you want the hatch door to rest in "closed" position, and get that spot marked for the striker.
Hatch door handle all shiny and chrome
Looking at the above photo, I need to install a bumper, trim and weatherstrip around the hatch door. Another major task arriving soon is fitting the side doors and installing their windows, handles, locks and trim/weatherstrip. Still plenty to keep me busy!
-cheers
Labels:
Benroy,
build,
camper,
door handles,
door locks,
doors,
drawer installation,
galley,
hatch,
hurricane hinge,
paint,
polyurethane,
polyurethane paint,
RV,
sliding doors,
teardrop,
tongue box,
trailer,
woodworking
Friday, June 22, 2018
Full Coat and Some Accessories
Let's keep the paint rollers rolling! The Teardrop now has a full coat of the Fire Red polyurethane paint, including doors, hatch door and the body.
The sides require another coat (or two), but this is essentially cresting the wave of completion. I've completed the fan install and will begin installing the hatch shortly since the roof/front surface has received 2+ coats of paint.
Alright, what else? The new door handles and locks for the side and hatch doors came in yesterday. I'd ordered a full set via Amazon earlier this week. I'm also visualizing the utility/tongue box finishing. It's gotta be diamond plate. I'm looking at aesthetics here, so I don't need heavy duty sheets. This product from Home Depot looks pretty good.
A rainy weekend is upon us, so I'll get some more progress in for sure.
-cheers
The sides require another coat (or two), but this is essentially cresting the wave of completion. I've completed the fan install and will begin installing the hatch shortly since the roof/front surface has received 2+ coats of paint.
Installed fan, silicone sealant around the bezel for waterproofing
Interior fan trim piece, trimmed to size to snuggle up to the ceiling
Alright, what else? The new door handles and locks for the side and hatch doors came in yesterday. I'd ordered a full set via Amazon earlier this week. I'm also visualizing the utility/tongue box finishing. It's gotta be diamond plate. I'm looking at aesthetics here, so I don't need heavy duty sheets. This product from Home Depot looks pretty good.
A rainy weekend is upon us, so I'll get some more progress in for sure.
-cheers
Labels:
Benroy,
build,
camper,
door handles,
door locks,
doors,
fan,
hatch,
paint,
polyurethane,
polyurethane paint,
RV,
teardrop,
tongue box,
trailer,
woodworking
Tuesday, June 5, 2018
Tongue box and body paint
That sounds a little dirty. Such is life when teardrop building. My last update was more than a month, let's catch up. I began building the custom tongue box for the front end. I also finally began painting the exterior.
And then begins the paint. I went with red polyurethane paint to loosely match my Tacoma. The specific make is Interlux Brightside marine paint in Fire Red, available here and elsewhere. Check the photos below for the first coat.
This paint went on nicely with a roller. It should provide great resistance to environmental elements, but it's not cheap. My source had it for $36.95 for a quart. I just ordered a second quart, as I've nearly finished the first quart on the front and top skin and the hatch and door you see above. I think I'll do fine with two coats, after sanding with 320 grit on the first coat.
The next round of activity will be just that, along with installing the roof vent/fan, painting the sides of the body and so on.
Tongue box main frame, 3/4" plywood
Bottom of utility tongue box
Side panels installed, 1/4" plywood for weight
Utility box mocked up on frame
Black Rustoleum in matte for the utility box
And then begins the paint. I went with red polyurethane paint to loosely match my Tacoma. The specific make is Interlux Brightside marine paint in Fire Red, available here and elsewhere. Check the photos below for the first coat.
Topside, Tara observes the first finish
The hatch door gets the roller
Front of the teardrop, hatch and one door first coat
This paint went on nicely with a roller. It should provide great resistance to environmental elements, but it's not cheap. My source had it for $36.95 for a quart. I just ordered a second quart, as I've nearly finished the first quart on the front and top skin and the hatch and door you see above. I think I'll do fine with two coats, after sanding with 320 grit on the first coat.
The next round of activity will be just that, along with installing the roof vent/fan, painting the sides of the body and so on.
Labels:
Benroy,
build,
camper,
doors,
hatch,
paint,
polyurethane,
polyurethane paint,
teardrop,
tongue box,
trailer,
travel,
woodworking
Sunday, April 15, 2018
Teardrop Wiring: Raceway, Lights and Fan plus some Other Goodies
Spring 2018 started to show itself a bit a week or two ago. I decided to get into some wiring and also made my final decision on building a tongue box rather than buying one. The motivation was that I could customize the size to fit my needs. It'll be large enough to house the deep cycle battery and a full size propane tank. I'm not sure yet if I'll run a full size propane tank regularly, but perhaps for longer trips.
Above, I'm cutting chunks of 3/4" plywood for the tongue box. The temperature was finally in the 50s again finally. Immediately the next day we had about 4 inches of show. Such is the new Spring here in Pennsylvania.
I've now mounted key elements of the wiring blocks in the raceway. Below, from left to right: busbar, ground-bar and fuse block.
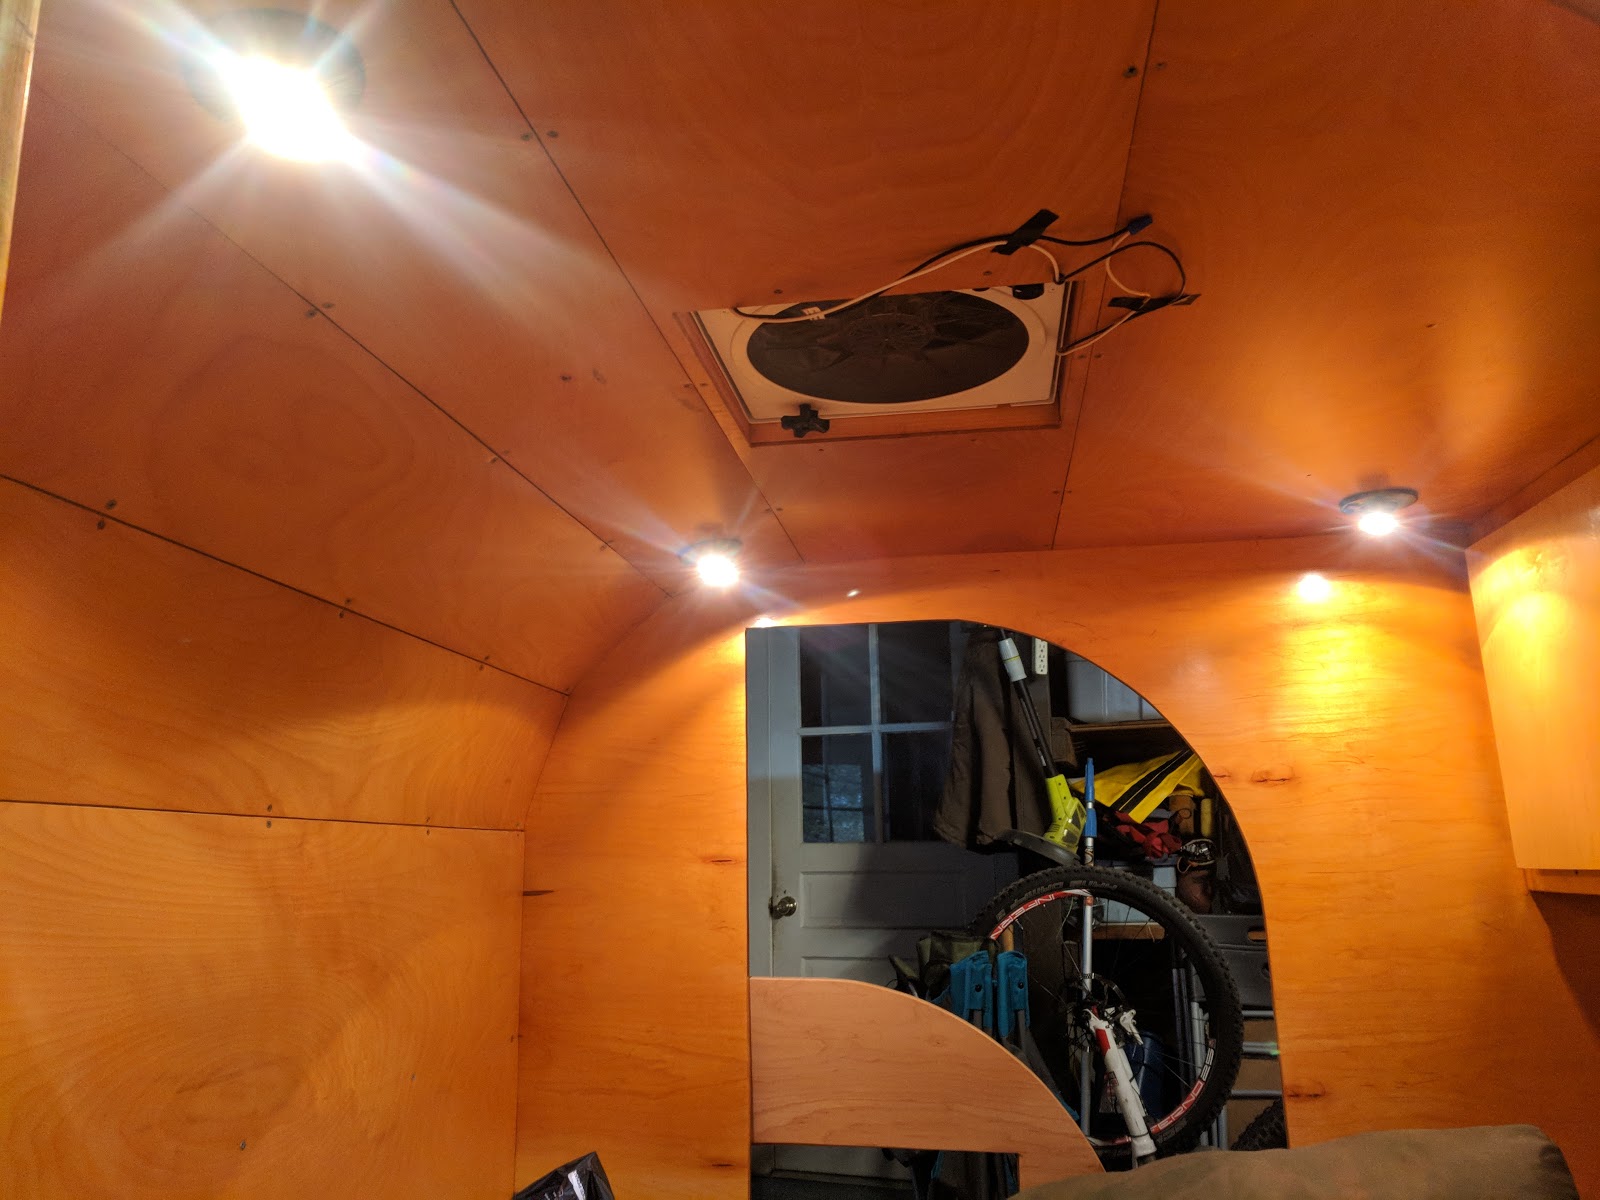
The photo below is just a higher elevation view of the wiring raceway to provide a different angle. I have to break now to establish a milestone. Up to this point, the cabin lights and fan have been sitting quietly in place with the their wiring running through the ceiling and dangling into the raceway. I've finally terminated all that onto the fuse and ground blocks. The wiring from the tongue to the raceway is now also in place and connected.
With drums rolling, I set the battery on the tongue, popped in my fuses and flicked the switch on the main fuse...
We have power!
Ok, it's a minor accomplishment, but a good sanity check to ensure I didn't drive a screw through a wire somewhere up there. Below, I have two photos of all four cabin lights in all their glory.
I have the battery resting below with temporary connections, waiting until I have the tongue box built up. In the lower left of the photo you see the 20 amp fuse on the positive terminal side.
Below, I have a more focused view of the electrical raceway. On the left is the main busbar with the positive feed from the battery. The busbar breaks off at the top into the fan and two light feeds into the fuse block on the right. The middle block is the main ground. I'll post explicit wiring diagrams in a later post. I mean really explicit, NSFW (not safe for wiring more likely).
I've also tested the fan wiring, which you can see temporarily wired up in a few of the previous photos Final wiring for the fan will occur after painting and trim work. It was certainly a milestone to see the internal wiring operational.
I'll move on to the tongue box this week with a really nice battery mounting situation in mind, along with storage.
-g
Tuesday, March 27, 2018
Cabin Doors, CPES and Some Hatch Work
Work continues on the cabin doors while Winter continues to hammer us with snow and cold temperatures. I'd expected to at least see some days in the 50s at this point in March, but I'm still blasting the propane heater for every teardrop session. I was anxious to see the 50s so that I could apply the CPES (Clear Penetrating Epoxy Sealer) with the garage open for ventilation. As Winter overstays its welcome, I've had to just plow through.
I've finished sanding and cleaning up edges and lines on both cabin doors, and you see one above with a coat of CPES. I had the garage door (the human version) open to at least balance temperature with ventilation. It's nasty stuff, but the Spring temps refuse to show.
With both doors coated with CPES, I used the remainder of the batch and applied it to areas of the hatch door above. I don't want to waste CPES, it's a bit expensive. The outer left and right ribs and adjacent surfaces got the attention, as well as parts of the two ribs inside those. Once that dried, the hatch door went back onto the teardrop with a few temporary screws so that I could trim the bottom edge.
This was my final major trimming of the hatch door. The bottom edge, on the right side of the photo above, needed some trimming to normalize the gap between the door and floor when closed. The belt sander was a slow, but successful tool here. A couple hours of grinding away with the sander in that position is good for your arms and shoulders, right?
The hatch door made its way once again to the bench for more sanding and finally a motherlode of CPES. (I've been referring to it at EPS in more recent posts, I'll go back and fix that). I really overdid it. It's still in the 40s outside, and I opened the human garage door for ventilation, but the scent was still overpowering. I ended up with a headache after applying the CPES to such a large surface area. I woke up at 3AM with the headache as strong as ever and had to open the bedroom windows to the freezing air to solve this. I told you this stuff is nasty. I won't be doing another large treatment until Spring weather arrives. It's frustrating, since it's taking its time. I've got plenty to do in the meantime!
-g
I've finished sanding and cleaning up edges and lines on both cabin doors, and you see one above with a coat of CPES. I had the garage door (the human version) open to at least balance temperature with ventilation. It's nasty stuff, but the Spring temps refuse to show.
With both doors coated with CPES, I used the remainder of the batch and applied it to areas of the hatch door above. I don't want to waste CPES, it's a bit expensive. The outer left and right ribs and adjacent surfaces got the attention, as well as parts of the two ribs inside those. Once that dried, the hatch door went back onto the teardrop with a few temporary screws so that I could trim the bottom edge.
This was my final major trimming of the hatch door. The bottom edge, on the right side of the photo above, needed some trimming to normalize the gap between the door and floor when closed. The belt sander was a slow, but successful tool here. A couple hours of grinding away with the sander in that position is good for your arms and shoulders, right?
The hatch door made its way once again to the bench for more sanding and finally a motherlode of CPES. (I've been referring to it at EPS in more recent posts, I'll go back and fix that). I really overdid it. It's still in the 40s outside, and I opened the human garage door for ventilation, but the scent was still overpowering. I ended up with a headache after applying the CPES to such a large surface area. I woke up at 3AM with the headache as strong as ever and had to open the bedroom windows to the freezing air to solve this. I told you this stuff is nasty. I won't be doing another large treatment until Spring weather arrives. It's frustrating, since it's taking its time. I've got plenty to do in the meantime!
-g
Saturday, March 17, 2018
Cabin Door Trimming
Ah yes, the cabin door struggle. They begin as just cutouts from the side walls of the teardrop, but there's much more to it than that. I estimate that you need about 1/2" space around the perimeter when they're sitting in the wall. You need to account for trim and some weatherstrip.
I've already trimmed the side doors down, as you would see in a previous post. Today, I mocked up the aluminum trim on one door and really needed another 1/8" trimmed off the two straight sides.
Above, you see the door resting in place with the trim mocked up. I used a belt sander for the trimming, but I might've used a saw if I'd known I needed to lop off this much. It's OK, I'm almost done with the second door's sanding.
After that, I'll pop off the aluminum trim, tidy up the window areas, do some finishing sanding and apply EPS to the entirety of the doors. Ok, maybe this won't all happen this weekend.
-g
I've already trimmed the side doors down, as you would see in a previous post. Today, I mocked up the aluminum trim on one door and really needed another 1/8" trimmed off the two straight sides.
Above, you see the door resting in place with the trim mocked up. I used a belt sander for the trimming, but I might've used a saw if I'd known I needed to lop off this much. It's OK, I'm almost done with the second door's sanding.
After that, I'll pop off the aluminum trim, tidy up the window areas, do some finishing sanding and apply EPS to the entirety of the doors. Ok, maybe this won't all happen this weekend.
-g
Tuesday, March 13, 2018
Hatch and Galley Slider Doors Continued
March is here, and I wrapped up a few more tasks on the teardrop. It's all details now, it's just endless details that seem to spawn more details. Here's some details!
This was the hatch fit. The real-deal hatch fit, accomplished with actual screws once I'd dry-fit and trimmed and dry-fit and trimmed and... you get the idea. Just three screws to sanity-check the fit. I think the hatch door bowed out a bit, but it'll smash down when latched.
There will be some room in there for weather-proofing material once we're done. The key thing is that it's pretty "square". Here's an open look at the hatch door, tentatively attached.
I had to do some trimming of the upper edge of the hatch to deal with some oddities - the upper galley face for the sliding doors was a bit more aft than spec. Wood is nice in that you can adjust it with a belt sander.
That's the adjustment for clearance. This is where I recalled Mr. Miyagi's lessons: hatch on, hatch off, hatch on, hatch off... until I had the proper clearance. We move on to the galley sliding doors, which are now finished with several coat of polyurethane and pushed into place with the sliders screwed in.
The galley is structurally complete. There are some other details like power outlets, but that will come in time. I'll move on to the cabin doors now, whose fitment can be difficult. The hatch needs some wiring runs as well for the tail lights.
Until next time!
-g
This was the hatch fit. The real-deal hatch fit, accomplished with actual screws once I'd dry-fit and trimmed and dry-fit and trimmed and... you get the idea. Just three screws to sanity-check the fit. I think the hatch door bowed out a bit, but it'll smash down when latched.
There will be some room in there for weather-proofing material once we're done. The key thing is that it's pretty "square". Here's an open look at the hatch door, tentatively attached.
I had to do some trimming of the upper edge of the hatch to deal with some oddities - the upper galley face for the sliding doors was a bit more aft than spec. Wood is nice in that you can adjust it with a belt sander.
That's the adjustment for clearance. This is where I recalled Mr. Miyagi's lessons: hatch on, hatch off, hatch on, hatch off... until I had the proper clearance. We move on to the galley sliding doors, which are now finished with several coat of polyurethane and pushed into place with the sliders screwed in.
Until next time!
-g
Labels:
Benroy,
build,
camper,
doors,
galley,
hatch,
polyurethane,
RV,
sliding doors,
teardrop,
trailer,
woodworking
Subscribe to:
Posts (Atom)


