Outer skin came first. The garage is open for business, and I'm cutting the lower front outer skin. It was a bit wider than spec, so I adapted. This piece is something like 30 inches tall. I'd tell you precisely, but I'd have to rip the front skin off, as I'd written the notes on the inside.
This is the lower front section is its complete form. I've applied a weather proofing agent to both sides. The product is sourced from The Rot Doctor, and online retailer, and is called Clear Penetrating Epoxy Sealer (CPES). It's expensive, but builders swear by it. You can certainly feel the difference, the wood feels harder, which is quite evident if you've applied it over pencil markings and you try to sand them off.
Here is the panel installed in the below photo. The bendy parts are up to come, as the next section up will be installed after the front cabin lights are in.
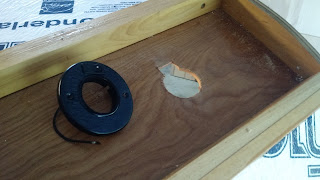
Like many things, the cabin lights install is part of a series of prerequisites. I want to at least polyurethane the inside headliner around where the fixtures will sit. Sanding before that. Really, I should just finish the interior headliner with a full sanding and polyurethane treatment. Regardless here is the process for installing these particular lights. Below are my placement measurements: 7" from the sides and splitting the headliner segment at 4.5". This could vary for preference.
I now cut out a keyhole-like hole in the headliner to accept the orbital portion of the lamp as well as the wiring/switch connector bit.
The next two photos are of a reinforcement for the assembly. The lamp screws into the wood as a surface mount, but 1/4" plywood does not provide much to grab onto. Pivoting the lamps, as they are designed, will eventually loosen up those screws. This block of wood will allow the screws to chew into something more substantial and also provide a boundary to butt the insulation up against. The open side allows for the switch/wiring block and also makes it easy to cut with a jigsaw.
That's it for the weekend. There was some good progress here, and hopefully I can get some more time into this in the coming weeks. Next, I'll cut the remainder of the reinforcement blocks and tack them down with some Gorilla Glue, waiting to screw the light housings into them from underneath. And then there're many directions I could take: sand and polyurethane the headliner, cut out the ceiling fan section, work on the galley... you get the idea.
[g]
[g]


No comments:
Post a Comment