Crack a cold one, the hatch is structurally done. One last 4' x 8' sheet of plywood bought and brought home. The last chance to miss a measurement and be forced to purchase another 4' x 8' sheet of plywood because you can't form a five-foot by four-something panel with scraps. Here's the Last Big Cut jig:
I'll oblige myself with a selfie and the finalized section of hatch skin:
The next two photos describe the attachment of the first edge. It's the upper edge of the hatch, in any case. All attachment points to the frame were countersunk and Gorilla glue was applied between the skin and the vertical spars.
The bend towards the bottom edge of the hatch gets a bit strenuous, so I used some bracing to pull it downward to button down the remainder.
Here is the finalized hatch:
I did a quick mock-up with the hatch and it looks like it fits pretty well. There will always be some bending and shaping, but it looks like I'm in good shape moving forward.
Since I was able to put a full day in working on the Teardrop, I hit a few more things. I added the last coat of polyurethane to the galley surfaces and installed knobs on the galley drawers, as seen in the photos below.
Due to the extended holiday that I arranged, I have two more days to put a good amount of work into the Teardrop. I'll slide the drawers in and do some more finishing on the hatch and see where else the hours take me.
-g
A blog documenting the building, re-building, travels and experiences of a DIY Teardrop camping trailer.
Showing posts with label bend plywood. Show all posts
Wednesday, July 5, 2017
Teardrop Hatch and Other Miscellany
Labels:
bend plywood,
Benroy,
build,
camper,
galley,
hatch,
polyurethane,
RV,
teardrop,
trailer,
woodworking
Tuesday, May 9, 2017
Weatherproofing the Hull
Ok, it's not a boat, so it has no hull. What I was really doing last night was applying an epoxy sealer to the outside surfaces of the Teardrop. I use a product from a company by the name of Rot Doctor (www.rotdoctor.com/) called CPES - Clear Penetrating Epoxy Sealer. Just one application provides noticeable protection. It's even tough to sand once dried. Also note that it is very thin and easy to work with.
The second photo shows a partially-sealed side. The darker wood has been treated. The fumes from this stuff are quite strong, so make sure you have ample ventilation!
The vent fan is arriving today, I'll post some pics of that later. I'm crossing my fingers that it'll be much more quiet than the prior unit.
-g
The second photo shows a partially-sealed side. The darker wood has been treated. The fumes from this stuff are quite strong, so make sure you have ample ventilation!
The vent fan is arriving today, I'll post some pics of that later. I'm crossing my fingers that it'll be much more quiet than the prior unit.
-g
Labels:
bend plywood,
Benroy,
build,
camper,
epoxy,
RV,
sealer,
teardrop,
trailer,
woodworking
Wednesday, April 6, 2016
What's this? A teardrop update!
What year is this? It's the new year, 2016, and well into it. I haven't had any regular updates, but there has been some work done on Teardrop II. There's also been a lot of not-work days. It's been a busy Winter of all things, mostly work related. Anyway, I'll take us back to November 4th, where I ratcheted the front curve of outer plywood down a bit more in the photos below.
I have since screwed it down flush and cut the 14" x 14" square hole for the vent fan. It'll fit a standard RV 12v fan that I'll order some day soon. Below you can see the progress.
I've also set upon the galley drawer faces, which I'd cut fresh from 3/4" Birch plywood I still had in stock. Below are photos of those, the dimensions are as spec in the Generic Benroy plans.
Ah, cozy days in the garage with the heater burning in the background. Speaking of some of the more homelike touches, I also began to finish the rough cut cabin doors by sanding and laying some polyurethane coats down.
Let's extend that treatment to the galley doors. In the next photo is the drying rack for all of these items above, the galley drawer faces and doors and the cabin doors. The drying rack is really just some junk spanning some other random juts and objects in the garage.
One of the other various Home Depot trips netted another piece of conduit that could fit the ceiling to electrical raceway. Remember this (more myself than you), it's 3/4" PVC. Here's the evidence below.
Finally, I have to leave you with photos of the honorary shop cat and a view from my camp chair in the garage.
Here's to more building soon, cheers!
[g]
I have since screwed it down flush and cut the 14" x 14" square hole for the vent fan. It'll fit a standard RV 12v fan that I'll order some day soon. Below you can see the progress.
I've also set upon the galley drawer faces, which I'd cut fresh from 3/4" Birch plywood I still had in stock. Below are photos of those, the dimensions are as spec in the Generic Benroy plans.
Ah, cozy days in the garage with the heater burning in the background. Speaking of some of the more homelike touches, I also began to finish the rough cut cabin doors by sanding and laying some polyurethane coats down.
Let's extend that treatment to the galley doors. In the next photo is the drying rack for all of these items above, the galley drawer faces and doors and the cabin doors. The drying rack is really just some junk spanning some other random juts and objects in the garage.
One of the other various Home Depot trips netted another piece of conduit that could fit the ceiling to electrical raceway. Remember this (more myself than you), it's 3/4" PVC. Here's the evidence below.
Finally, I have to leave you with photos of the honorary shop cat and a view from my camp chair in the garage.
Here's to more building soon, cheers!
[g]
Labels:
bend plywood,
Benroy,
build,
camper,
RV,
teardrop,
trailer,
woodworking
Monday, November 2, 2015
Teardrop Outer Skin and Insulation
I took a trip to Home Depot after work last week to pick up a 5' x 8' sheet of 1/4" plywood. I ended up with more birch, for its quality, but that's a bit of a misnomer. The top several sheet had defects... mostly de-lamination and faults in the outer veneer. I found a sheet that was solid, but had one end with poor coloration. I quickly measured with a tape measure on the rack nearby and realized I would be lopping that section off anyway.
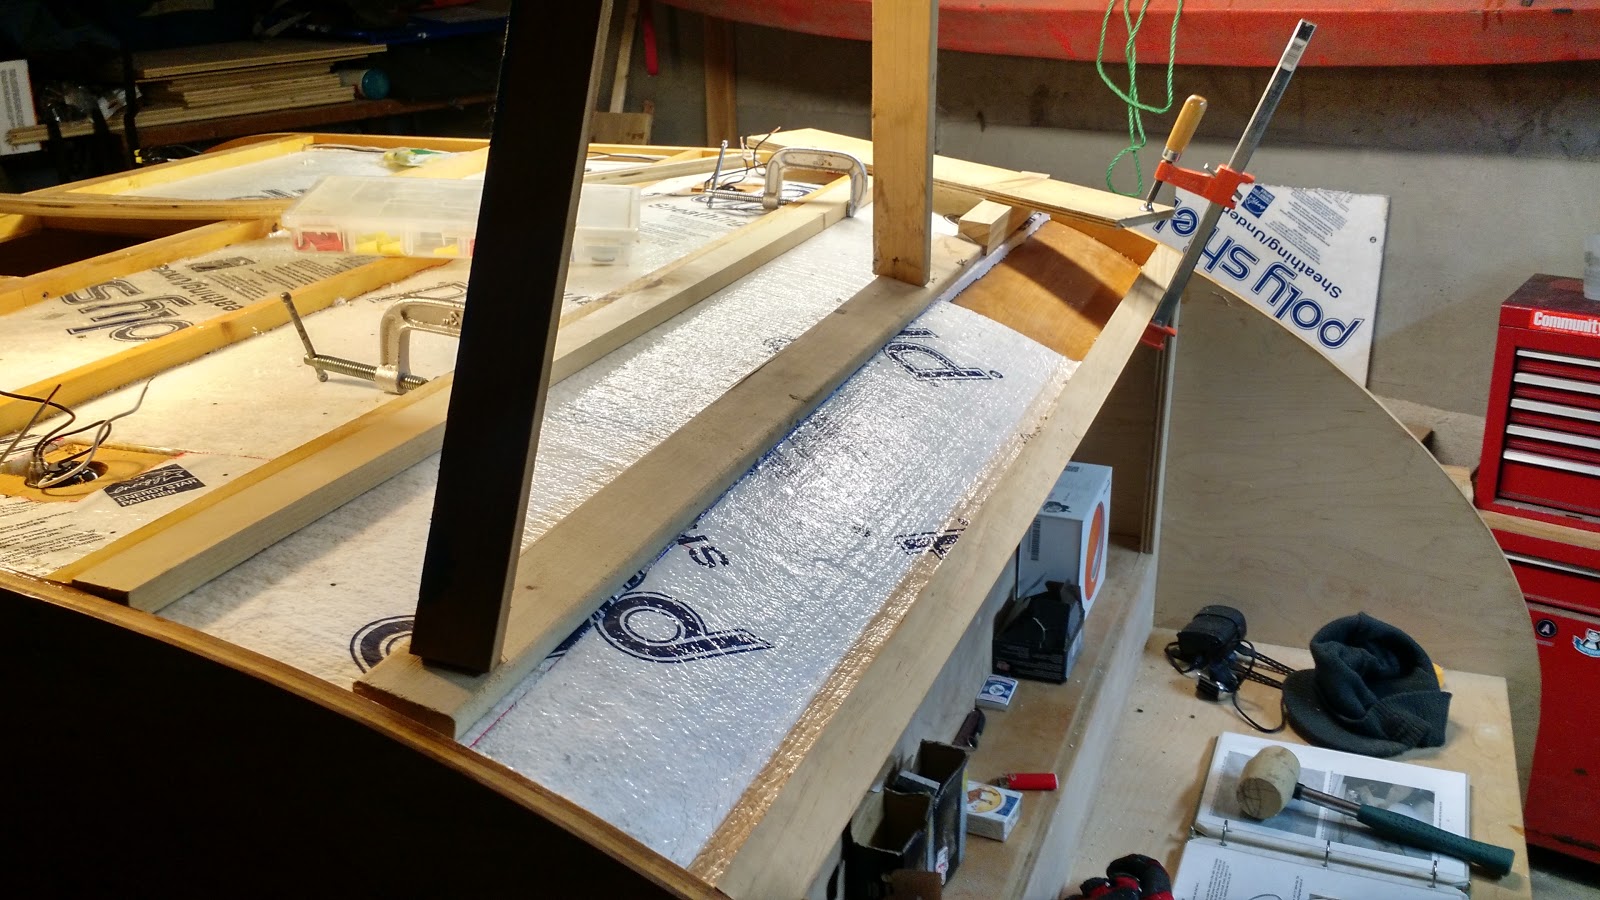
Prior to that, however, I finished the insulation above the galley section of the headliner. I had spare chunks hanging around, so I pieced them together to fill out that section. Below are a few photos of that progress.
I placed a brace across the center and jammed it against the garage ceiling to keep the insulation down, as it's on a curve and there's a seam across the center span.
The next task was to cut the section of plywood to fit the front curve of the outside of the teardrop to stretch from the previously installed skin to the center of the back of the "fan mount" double spar on the top. I'll get to that later. Here are a few photos of the section that has had Rot Doctor EPS applied on the underside and the initial fitment to the front of the teardrop.
I'm going to let that front seam set overnight, or at least until I get back to work, so the glue can dry nicely. However, I've already started training the curve of the wood with a cargo strap, seen below. It's just enough to start to pull the curve back.
That seam on the front is problematic, it will want to pop outwards due to the torque applied by the entire bend. Let's let it rest for a bit. Now, for the measurement to the length, front to back, of the section, see the photo below. I want it to rest directly at the seam between the two glued-together spars that sit at the rear of the fan cutout. That's at about the center of the photo.
You then have something for the outer skin to bite on for both this section of headliner (to the left of the photo) and the section that will follow to the right.
That's it for the past week. I determined that my deep cycle battery is dead, so I have to snag something to test the front cabin lighting before sealing it up with the outer skin section, and then I can glue and screw this thing down.
Here's to more work days in the garage with decent temps,
cheers!
[g]
Prior to that, however, I finished the insulation above the galley section of the headliner. I had spare chunks hanging around, so I pieced them together to fill out that section. Below are a few photos of that progress.
I placed a brace across the center and jammed it against the garage ceiling to keep the insulation down, as it's on a curve and there's a seam across the center span.
The next task was to cut the section of plywood to fit the front curve of the outside of the teardrop to stretch from the previously installed skin to the center of the back of the "fan mount" double spar on the top. I'll get to that later. Here are a few photos of the section that has had Rot Doctor EPS applied on the underside and the initial fitment to the front of the teardrop.
I'm going to let that front seam set overnight, or at least until I get back to work, so the glue can dry nicely. However, I've already started training the curve of the wood with a cargo strap, seen below. It's just enough to start to pull the curve back.
That seam on the front is problematic, it will want to pop outwards due to the torque applied by the entire bend. Let's let it rest for a bit. Now, for the measurement to the length, front to back, of the section, see the photo below. I want it to rest directly at the seam between the two glued-together spars that sit at the rear of the fan cutout. That's at about the center of the photo.
You then have something for the outer skin to bite on for both this section of headliner (to the left of the photo) and the section that will follow to the right.
That's it for the past week. I determined that my deep cycle battery is dead, so I have to snag something to test the front cabin lighting before sealing it up with the outer skin section, and then I can glue and screw this thing down.
Here's to more work days in the garage with decent temps,
cheers!
[g]
Labels:
bend plywood,
Benroy,
build,
camper,
RV,
teardrop,
trailer,
woodworking
Sunday, April 26, 2009
A Lesson in Bending Plywood
A teardrop trailer build is a journey which has many lessons. Especially if you've really not built your fair share of cabinets and have faced the rigours of bending plywood. The cabinet assembly came together like peanut butter and jelly, which was really just a tease, since the headliner for the teardrop looked to be an easy task, but has cost me dear time and money. The headliner is the section of the roof, the inside skin, that runs from the bottom front of the trailer to the rear upper hatch area, as one piece. So it has a fairly decent bend in the upper front of the trailer, and the first forceful attempt at fitting the initial headliner ended with busted out plywood. It was dry, and not pre-bent at all, and I learned that it just wasn't going to work. So here's the rig I've masterminded for the next headliner. It's designed to gradually crank the bend in with ratcheting cargo straps and applications of water.
Over the course of the day, I've been tightening the screws, so to speak, and so far, no cracks or blowouts. Tomorrow, I'll do the same and begin to check the radius of the arc to determine the fit. I'm hoping for some degree of "training" of the wood, and then I'll slip it into the interior. While some of this was occuring, I cooked up a handful of ribs for the hatch door. As usual, I'm working in a non-linear fashion. These are five 3/4" birch plywood ribs that will hold the shape of the aft hatch door. But that's later on. For now, I'm looking at what appears to be a skateboard ramp in progress.
[g]
Over the course of the day, I've been tightening the screws, so to speak, and so far, no cracks or blowouts. Tomorrow, I'll do the same and begin to check the radius of the arc to determine the fit. I'm hoping for some degree of "training" of the wood, and then I'll slip it into the interior. While some of this was occuring, I cooked up a handful of ribs for the hatch door. As usual, I'm working in a non-linear fashion. These are five 3/4" birch plywood ribs that will hold the shape of the aft hatch door. But that's later on. For now, I'm looking at what appears to be a skateboard ramp in progress.
[g]
Subscribe to:
Posts (Atom)