The clock has struck September, and I feel like I want to get things moving faster. The drawer slides came in from Amazon and I had some building to do there as well as more insulation and interior polyurethane. I was also able to start working on the galley drawers with the new slides in hand.
The reinforcement idea refers to the middle floor reinforcement stud, constructed from a 2x4 coated in roofing tar. It has cutouts top and bottom to align with the bottom of the floor and and clearance for the metal trailer frame as well as cutouts for the bottom lip of the frame. It essentially jams into the sideways U profile of the frame. Here's a photo below.
It's hard to see, but it's the black bar that's closest to the camera. Other portions of the floor are supported by the remaining metal rails, but the middle section has a fairly large gap that needs this reinforcement.
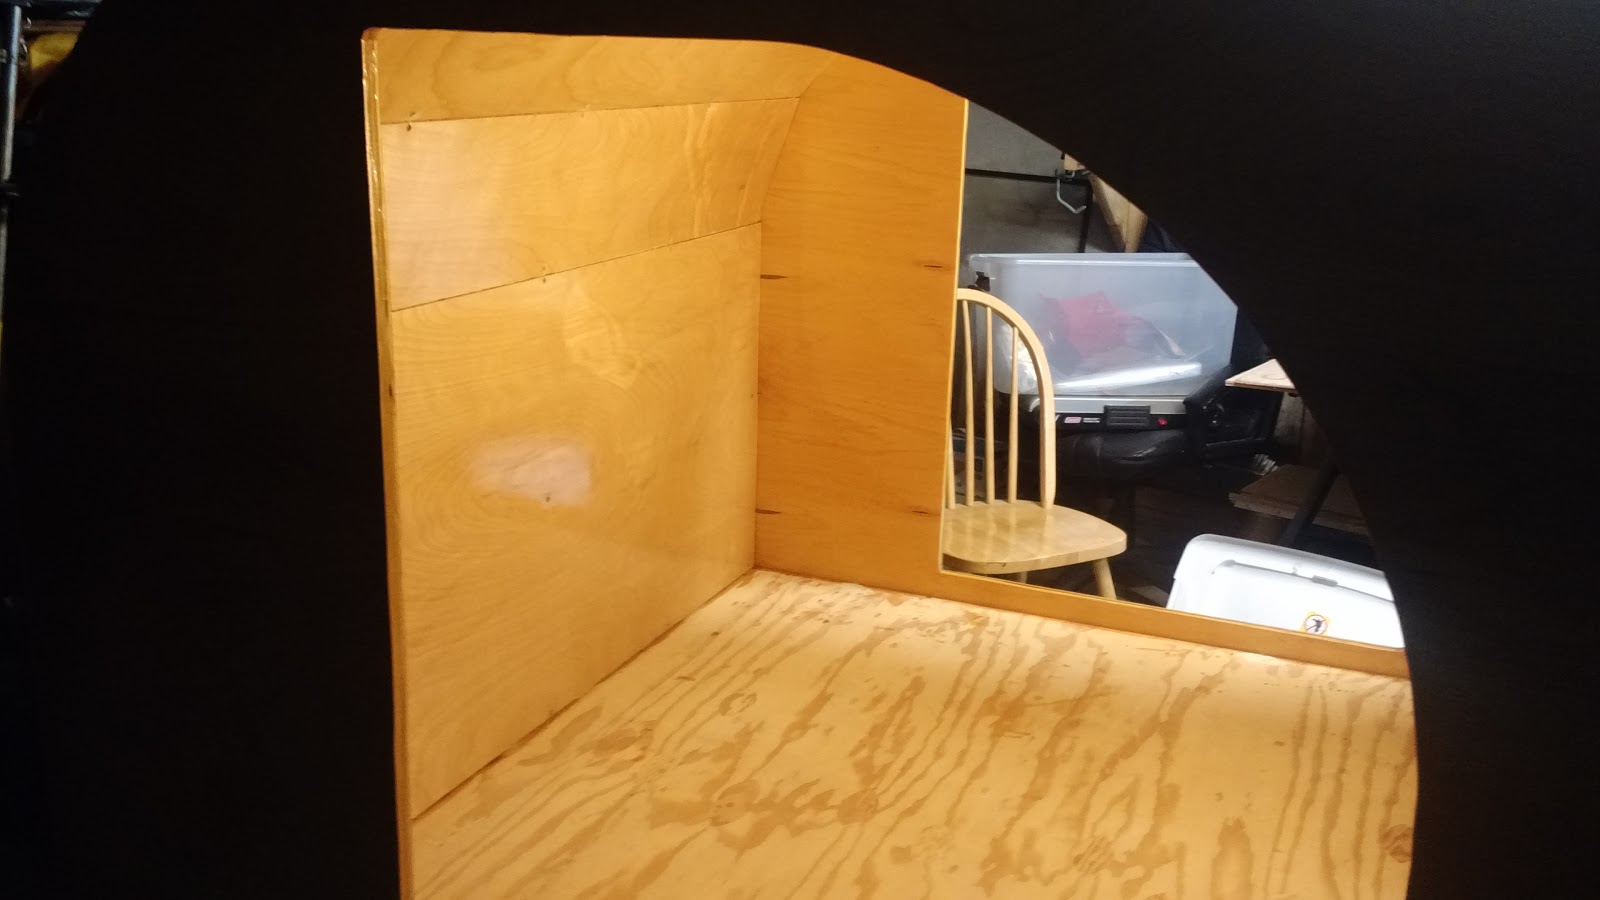
Other recent activity was completing the insulation around the aft interior light mounts. Below, there is a photo of the pieced-together insulation section.
The drawer slides arrived quickly this time from Amazon. They are decidedly Chinese in origin:
I've also laid down two coats of satin polyurethane on the interior headliner. I chose satin for the fact that it's less reflective than semi or full gloss polyurethane. Here are two photos below of the results.
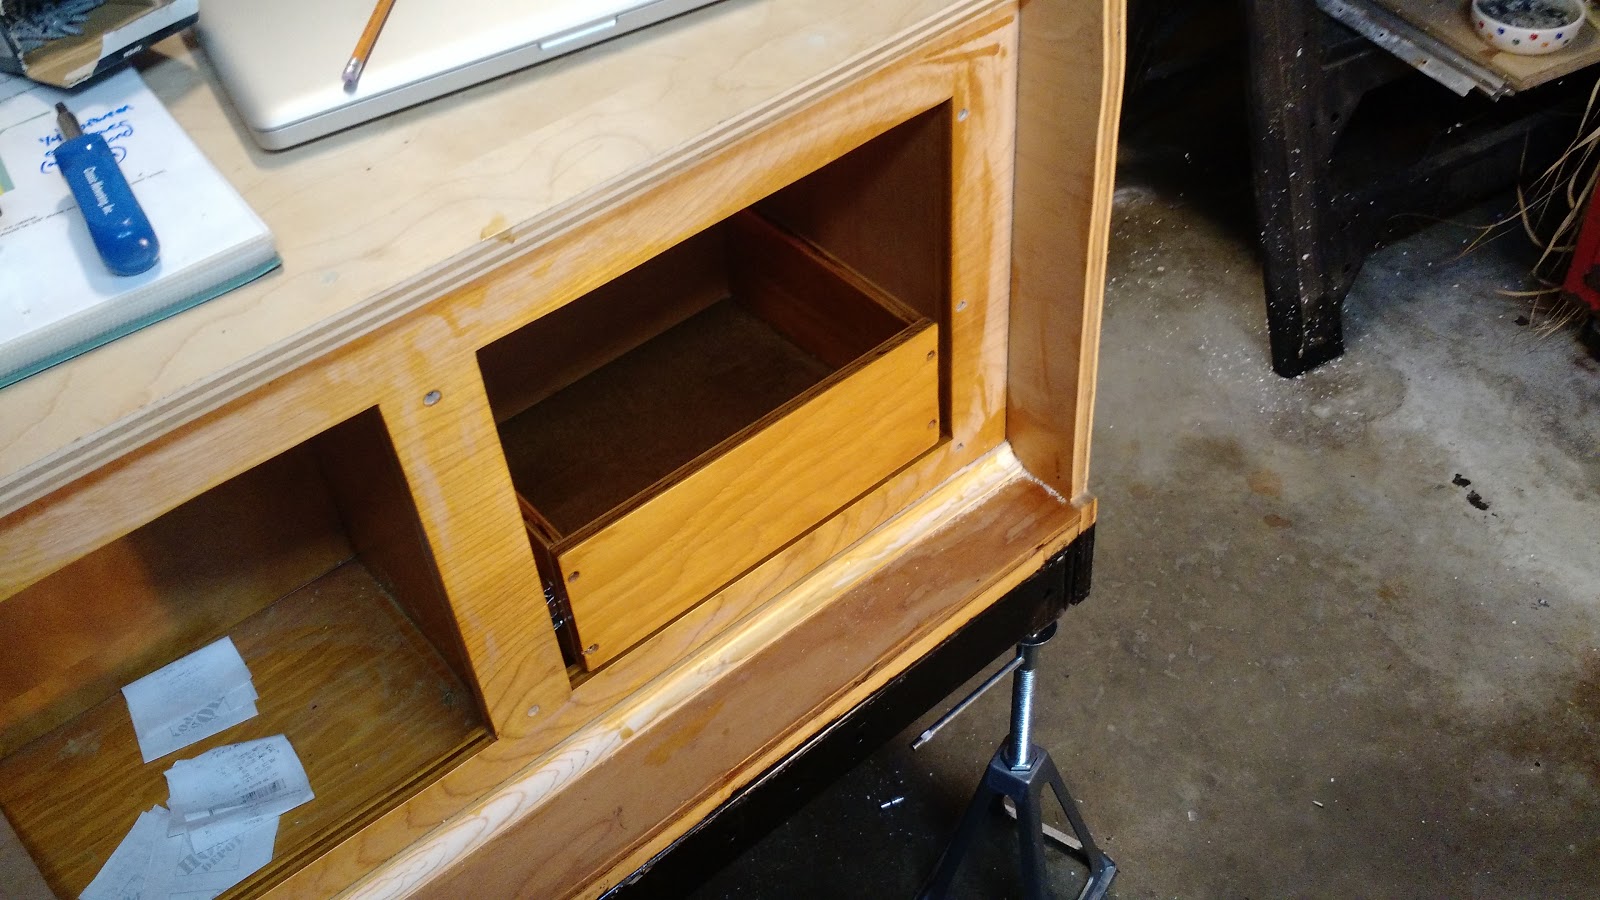
The drawer slides are easily attached, while considering the alignment in the tiny space allocated in the Benroy. These are 9 inch slides, seen below on the largest of the drawers.
The mounting width is 13 1/2 inches in the design, so you have to build a spacer on the left and right side. Fortunately, my build evolved such that I could use a 1x2 inch stud on the left side. The right side required several inches of spacer, so I went with installing a 3/4 inch section of plywood to fill out the width. Photos of this build are below.
The plywood section on the right above is glued and screwed into the galley cabinet face and from the bulkhead from the cabin.
Teardrop work only comes in short bursts. A few hours at uneven intervals, so I have to move from subproject to subproject while poly is drying, for instance. I'm almost done mounting the slides to the drawers, and then I'll install them within the drawer area. I want to cut the ceiling fan opening soon, but I will verify that I'm using the same fan assembly first. The sizing is fairly standard, in any case.
The interior lights will get wired soon too. At least the front set, as I can then lay the next section of the outside skin, that would otherwise obscure the mount locations for the front lights.
I'd love to take a trip in late October with this camper, but I don't know if I'll make the build in that time. I'm going to shoot for that date anyway, because deadlines really do make you move.
Until next time, cheers. I'm going to finish my beer and call it a night.
[g]