Sunday, May 17, 2009

This thing is About to Hatch

A week has gone by without an update, and things are coming together. I've finished the hatch frame and skinned the outside, and we've even tested a paint selection on the outer skin today. Tara did some sanding, and I coated the entire roof with CPES (remember that Rot Doctor stuff), which will provide superior water resilience underneath the paint. Let's get to the photos for a bit.


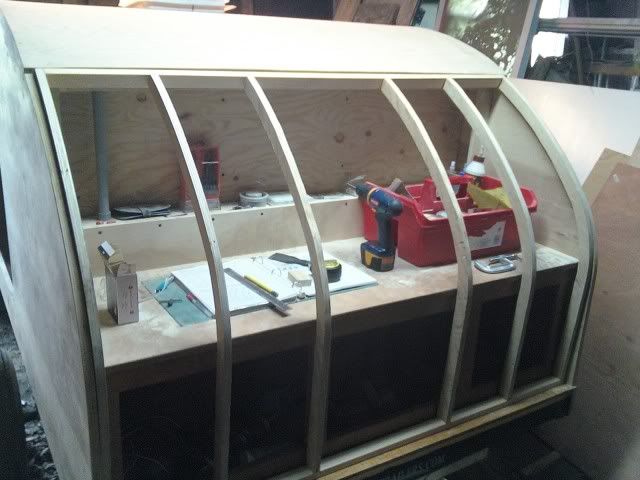
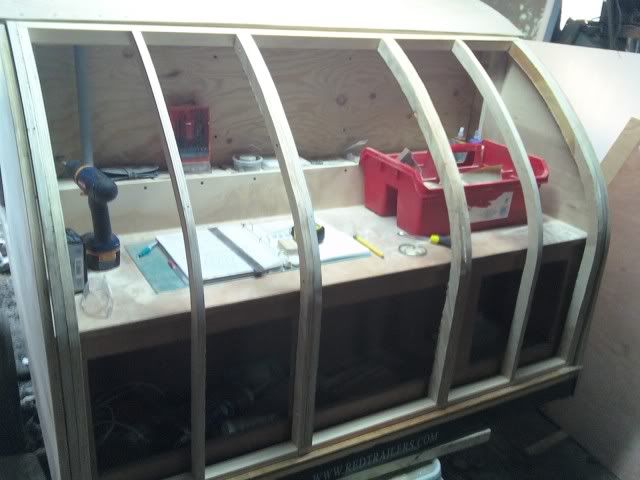
The completed hatch door frame


In the bottom left and right corners in the photo above, you see some extra framing for the taillights that I have on hand. I'll install those once the hatch is done.


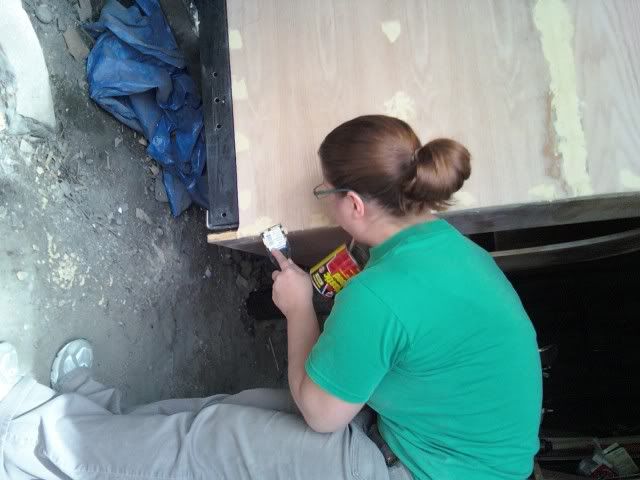
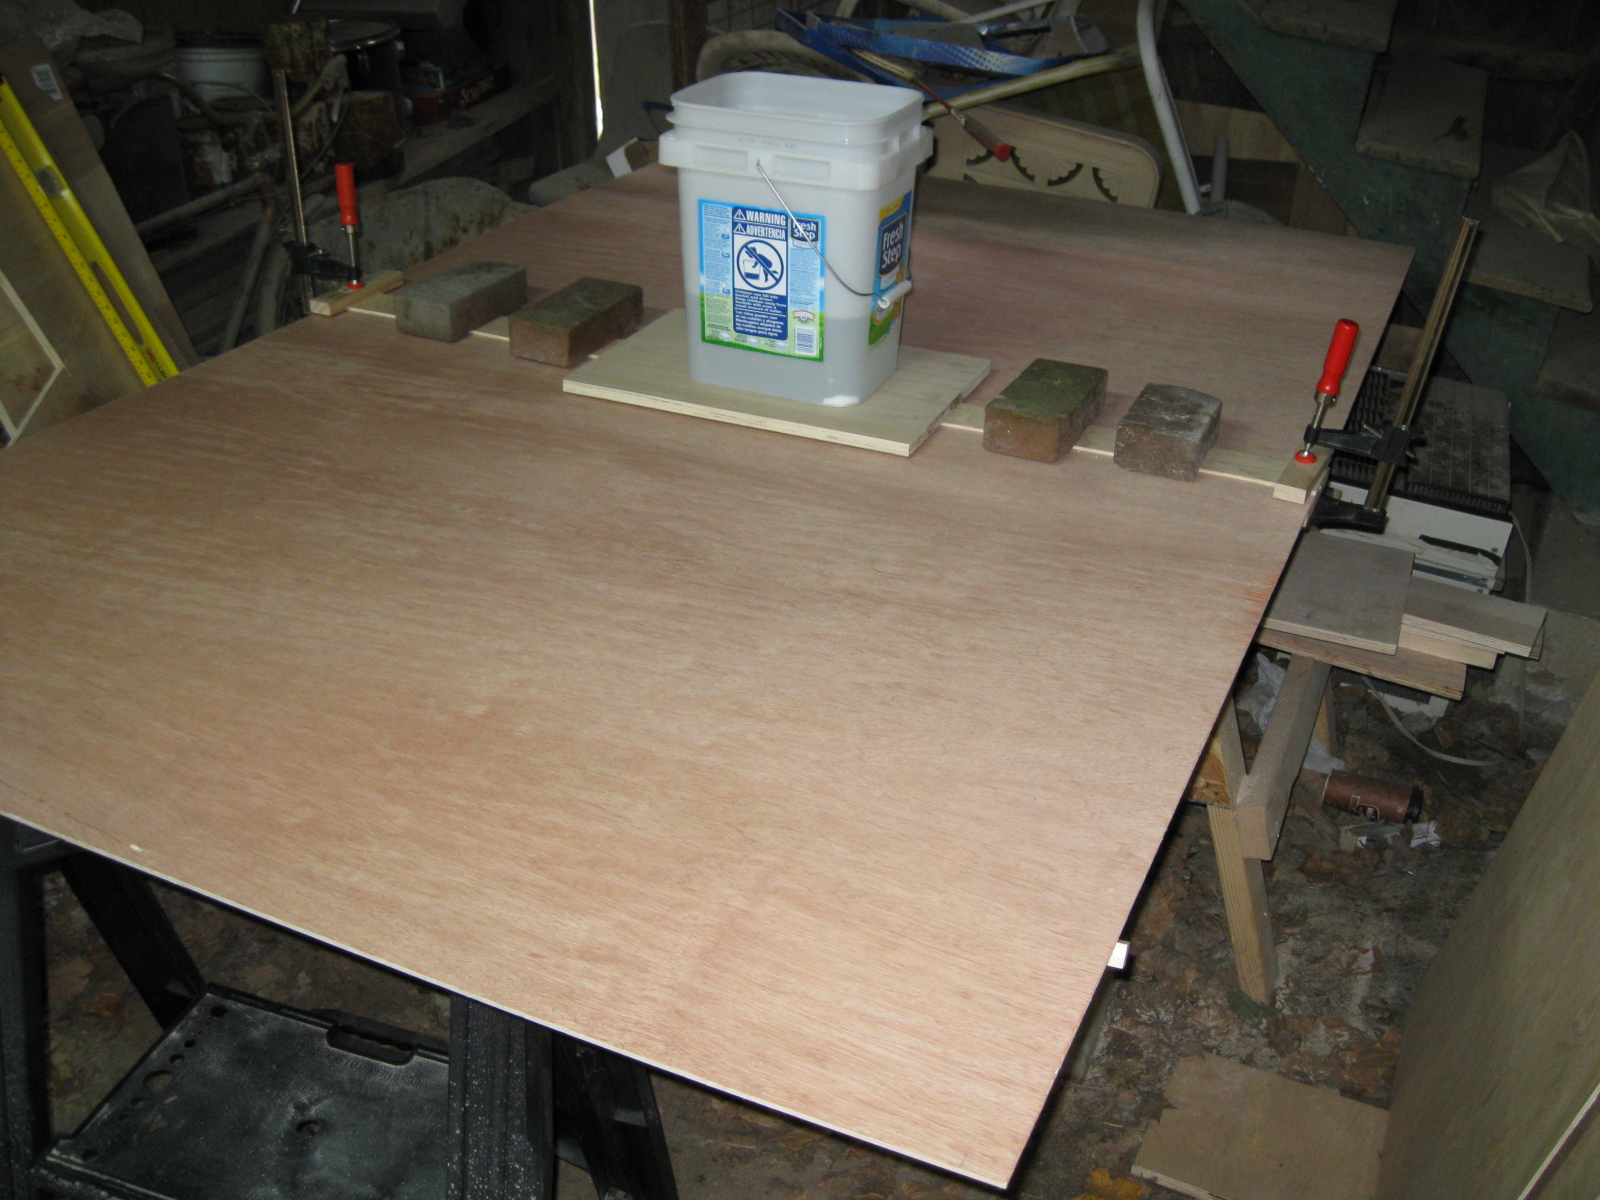
The outer skin installed on the hatch

The outer skin of the hatch, like the rest of the roof, is made of 5.2mm red oak plywood. The bend here went smoothly with my batch of clamps and 2x4s placed horizontally.


So, this is what it's going to look like when it's attached

We've revisited the interior again while other stuff was drying or setting up, and I'd hung the two cabinet doors.


Cabinet doors installed

I also had a number of parts come in last week, including door handles and latches for the two side doors and the hatch door and the "hurricane" hinge for the hatch door. All the aforementioned were from Li'l Bear (http://www.lilbear.teardrops.net/index.html), an excellent source for teardrop parts and a great place to deal with. Below, the hatch is temporarily installed with the hurricane hinge.


Hatch installed temporarily with the "hurricane" hinge

The hinge worked flawlessly. There were several iterations of installing and removing in order to trim the bottom edge of the hatch for clearance for weatherstripping. The hinge itself is a marvel of design that brings the pivot point up above the surface of the wood, forcing water to run off along the sides of the roof instead of into the hinge area. I recommend it.

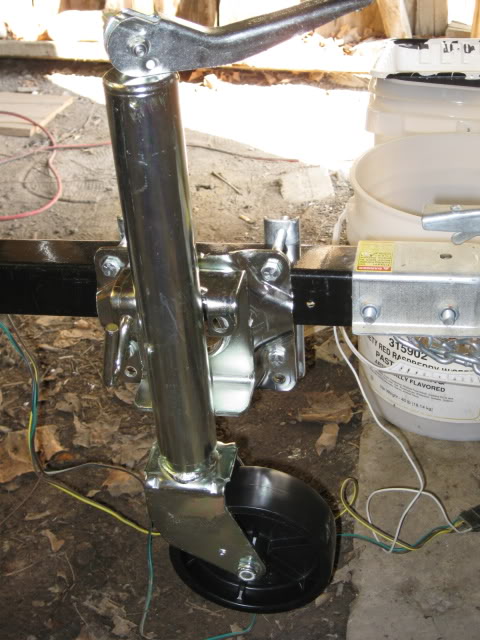
The final photo below for this post is one of the newly ordered fenders mocked up. These will be somewhat temporary, as I'd like to get larger and wider wheels and tires for trailer when I've finally recovered from buying everything else for this thing.


There's even more that's been completed, but I don't have photos yet, so that'll be next time. Like I'd said earlier, we've tested some paint for aesthetics, so that'll be part of the next update.

[g]

Saturday, May 9, 2009

She's a Hatchback

We can obviously see that, like my first car, this thing is a hatchback. Unlike the Dodge Daytona though, this is made of wood. Below, we have the progress on the frame that began a couple days ago and ended today.


This is the standard frame, with six ribs.


This is the augmented frame, with double ribs installed alongside four existing ones. Built for Strength©


This is the completed frame, except for a few bits that will frame in the taillights


In the center, lower area of the hatch frame, you can see boards that will hang the license plate light and door latch/handle (upper and lower boards, respectively). We doubled up today. Tara worked on puttying seams and countersunk screws on the body and began some finishing sanding. That's her below.


For maximum difficulty, we're assembling the teardrop while it hangs off a wall while and we defy gravity


To finish this up, I need to grab some taillights and fabricate the frames for them, and then I'll skin this thing up.

[g]

Friday, May 8, 2009

Ceiling Wiring and Skinning

In the five days since the last update, I've pulled the ceiling wiring for the lights and fan down to the electrical raceway and finished skinning the exterior, besides the hatch, which is a separate unit. More on that later.

As part of the ceiling wiring potion, I'd decided to add small frames in the ceiling around the light mounts in order to create a buffer from the EPS insulation and also give the light mounting screws something more to bite into than the 5.2mm plywood. Here's a few shots of that effort.


The photo below shows the first section of the outside skin being attached. The outside skin ended up being constructed of 5.2mm red oak plywood. 5.2mm is just shy of a 1/4".


The next section endures the most severe radius, so extra work with braces and cargo straps was necessary to keep things in place and assist with bending - especially when you do this by yourself.


Viewing from the galley end of the teardrop, we see the conduit installed that routes the ceiling wiring down to the electrical raceway, passing through the upper galley cabinet area.


It's made of a 3/4" radius PVC conduit with some fixtures on the ends to hold it in place nicely. With that in order, I could then skin the remainder of the roof, and the next two photos show the results.


These photos are from before the edges of the outside skin were trimmed down flush to the walls and galley horizontal spars. That's been done since.

As promised, I was going to discuss the hatch. That portion officially began a couple weeks ago when I cut the curved ribs, and today began the actual assembly. The outer frame is complete along with two internal ribs, but I don't have any photos on hand. I usually grab photos with my phone while I'm working and pull them down to my laptop via Bluetooth, but I just didn't get around to clicking any earlier this evening. I'll post them up next time along with any other progress.

[g]

Sunday, May 3, 2009

Several Good Days of Progress

It's the end of the weekend and, including Friday, there's been a flurry of activity. This includes finishing the headliner and some electrical work. The latter was all I worked on today, after taking a marathon, all afternoon parts trip to Home Depot and two different Radio Shacks and a mart that begins with a "K". I'll let photo captions say the rest.


The cut-out for the vent/fan


Rear and of the headliner screwed down now


Cut-outs for something...


More of the same cut-outs, which are for the item just below


12v aircraft style swiveling light


Here's two installed in the front area of the cabin


This was a test of the plywood on the front arc, the most severe radius on the teardrop. It passed


Tara can't wait, and is allegedly testing one of the lights that's temporarily hooked up


The mess up top. Four lights and fan connected together. Wire cleanup forthcoming


What's coming up soon is finishing up the ceiling wiring and skinning the outside. Soon, as in the next couple days.

[g]

Thursday, April 30, 2009

Got the Bends, and so I Don't

This is the third installment of the headliner saga. The headliner is the inside portion of the ceiling/front side portion of the roof, which is a sandwich construction involving the headliner, some insulation (and space and wiring) and the outer skin.

I have to stoop to a cliche and say that the third time is a charm. Yes, the second headliner I assembled and pre-bent failed in the applied, real-world test. It snapped spectacularly with a femur crack of splitting bone as I torqued it with ratcheting cargo straps attached to the barn rafters while trying to pull it into position inside the teardrop.

The third attempt was simple, calculated and foolproof. There were to be no extreme arcs, as I would build separate panels for the most pronounced front arc. It worked. It involved two nine inch by 58 1/2 inch panels to cover the dastardly bend, and the rest was just the ceiling and lower front portion of the inside skin. Fortunately for my wallet, I was able to salvage about two feet of the front liner up to the beginning of the arc. Here is the progress.


After the crack: saving the portion up to the second spar, where the first of the two panels will begin


Frontal view, showing the second of the 9-inch panels in place


Galley viewpoint: roofline liner in place, sans some bending to meet the rear cabinet frame


3/4 Front view. Not the best phone photo, but could be construed as a teardrop in motion, explaining the blurry photography. Yes, a teardrop tearing ass out of a barn: coming soon in your near future


Top view of headliner installation


Mood Lighting on Interior One


Mood Lighting on Interior Two - Sequel Goodness Box Office Hit


Tomorrow is Teardrop Day (again). Much work to be done, and I'm looking forward to it. Can't wait until this thing is road worthy and road wary.

[g]

Sunday, April 26, 2009

A Lesson in Bending Plywood

A teardrop trailer build is a journey which has many lessons. Especially if you've really not built your fair share of cabinets and have faced the rigours of bending plywood. The cabinet assembly came together like peanut butter and jelly, which was really just a tease, since the headliner for the teardrop looked to be an easy task, but has cost me dear time and money. The headliner is the section of the roof, the inside skin, that runs from the bottom front of the trailer to the rear upper hatch area, as one piece. So it has a fairly decent bend in the upper front of the trailer, and the first forceful attempt at fitting the initial headliner ended with busted out plywood. It was dry, and not pre-bent at all, and I learned that it just wasn't going to work. So here's the rig I've masterminded for the next headliner. It's designed to gradually crank the bend in with ratcheting cargo straps and applications of water.


Over the course of the day, I've been tightening the screws, so to speak, and so far, no cracks or blowouts. Tomorrow, I'll do the same and begin to check the radius of the arc to determine the fit. I'm hoping for some degree of "training" of the wood, and then I'll slip it into the interior. While some of this was occuring, I cooked up a handful of ribs for the hatch door. As usual, I'm working in a non-linear fashion. These are five 3/4" birch plywood ribs that will hold the shape of the aft hatch door. But that's later on. For now, I'm looking at what appears to be a skateboard ramp in progress.

[g]

Thursday, April 23, 2009

Mocked Up

I had to head out to pick up some screws for the headliner install (which will get installed soon, I mean it). I picked up a few other random electrical items along the way. Really just a grab bag, since I have just a dust mote of an idea of what I'm doing with the electrical in the teardrop. Here's a collection of just the beginning of the parts list I'll probably need.


Inventory: a GFCI outlet, a regular outlet, bus bar, GFCI tester and a regular outlet tester.

I also mocked up the install of the galley GFCI outlet. I cut the hole into the electrical raceway and set up the mounting holes, and you'll see that below. None of the wiring is done. Whatsoever. But this places the outlet for me. I plan to have one 120 outlet in both the galley and the cabin, and one 12 volt outlet in both as well. The big mental test will be figuring out how to hook this all together.


The headliner is ready to go in tomorrow. I plan on using Gorilla Glue and some short brass screws to connect it to the horizontal spars. The key phenomenom is bending the 2/8" birch around the interior curve.

[g]

Tuesday, April 21, 2009

Jacked Up

The trip to the RV shop was fortuitous. I came home with a shorter jack, but the funny part is that the mounting plate is the same size anyway. I used some scrap pieces of trailer frame to create some spacers and it fits just fine. I'm going to move the jack towards the rear for its final location, take a look.


The jack installation was quick enough, and I put the second coat of polyurethane on the insides and also the final coat on the floor. Here's a photo catching this state.


One thing you'll probably notice if you build one of these is that the galley becomes a makeshift workbench and planning center. It's regularly cluttered with the plan binder, cans of polyurethane, brushes, cups of coffee and power tools. For evidence, this is what my galley counter looks like at the moment.


Damn, two posts in one day! I think that means I'm making some progress.

[g]

Polyurethane time

Today was designated as polyurethane day, after my trip to Home Depot yesterday with gift card in hand to purchase a few buckets of the stuff and some foam brushes. I'm in between two coats of poly for the cabinet assembly and walls right now, as you can see below. The floors aren't finish-coated yet. That'll happen after the walls and cabinet is done.


To kill some time now, I have to run to the RV place and try to return this tongue jack that was too big for the rail. I think it was a bit too heavy duty. Hopefully I can return it and pick up this other one that might fit.

[g]

Sunday, April 12, 2009

Skeletal Teardrop

Now that I've fixed all the images I've broken on the blog, I can finally get some of the new progress reported. Since the last "update" post in March, a month has passed. Last time I had photos of the walls mocked up on the trailer base. Since then, I've cut and assembled the cabinet unit and have permanently attached that to the walls, which are, in turn, permanently attached to the floor. It was a splendid occasion, as it was a nice milestone in the build, and also that the day didn't end in me setting fire to a heaping mess of crooked lumber and driving to the liquor store with the inferno in my rear-view mirror. I think it could've been that bad, yes. Here're the photos.


Yes, the walls are off again. Rear section of the cabinets and a face of the cabinet laying down.


Closer look at the galley counter and cabinet space section


Cabinet sections coming together: looking at the galley side


Cabinet assembly nearly together: looking at the cabin side


Cabinet assembly mocked up and propped up - cabin view


Cabinet assembly mocked up - galley view


Finally, here's the cabinet assembly completely installed with the walls permanently attached. Also, the spars that provide the inner and outer skins are installed. Below that, we have the partial inner skin or headliner drying. It's assembled from three pieces of plywood for a total dimension of about 58 by 109 inches. One of the joints is drying with the help of some heavy objects.


Next up: finishing the headliner and installing that, then onto wiring perhaps and a million other things.

[g]